 how-to
Teach Hockey Positioning: A 2026 Coach's Guide
Table of Contents
- Why Teaching Hockey Positioning Matters Before Anything Else
- Build Hockey Positioning Drills That Actually Stick
- How to Teach Hockey Systems Without Overwhelming Players
- Hockey Practice Plans for Team Strategy: From Beginner to Competitive
- Teach Hockey Positioning Using an Interactive Hockey Strategy App
- Common Positioning Errors and How to Correct Them On the Ice
- Frequently Asked Questions
Last Updated: October 18, 2026
Why Teaching Hockey Positioning Matters Before Anything Else
To teach hockey positioning is to build the foundation of every successful team strategy.
The difference between a team that understands positioning and one that doesn't shows up immediately on the ice.
Here's what most coaches get wrong: they assume players will figure out positioning through repetition alone.
Teaching positioning requires three things: clarity about roles, practice that reinforces those roles, and a way to see if players actually understand the system.
Build Hockey Positioning Drills That Actually Stick
Drills teach positioning through repetition with purpose. The best drills force players into correct positions by constraining their movement options. They can't cheat. They can't default to old habits.
The key is starting simple and layering complexity. A drill that's too advanced becomes frustrating. A drill that's too basic doesn't challenge players to think.
Small-Area Games for Positional Awareness
Small-area games teach positioning because they force tight spacing and constant decision-making.
A 3-on-3 game in the offensive zone teaches support and spacing instantly.
Start with 3-on-3 in one zone for 2-minute shifts. Players move constantly and see results immediately.
Progress to 4-on-4 games with a neutral zone. Now players must manage transitions and spacing across more ice.
Constrained Movement Drills by Age and Skill Level
Constrained drills remove player choice and force correct positioning. This works for every age group.
For ages 5-8 (beginner):
- One-touch passing in a small square (20x20 feet)
- Players must pass immediately after receiving
- No skating with the puck allowed
For ages 9-12 (intermediate):
- Designate specific zones where each player must stay
- Forwards stay in the offensive half
- Defensemen stay in the defensive half
For adults and competitive players:
- Add time pressure: players have 2 seconds to pass
- Add directional rules: passes must go forward or lateral, not backward
- Add role-specific constraints: centers must touch the puck on every play, wingers must shoot from the perimeter
The constraint forces the correct positioning. Remove the constraint, and players revert to old habits. That's why these drills work.
How to Teach Hockey Systems Without Overwhelming Players
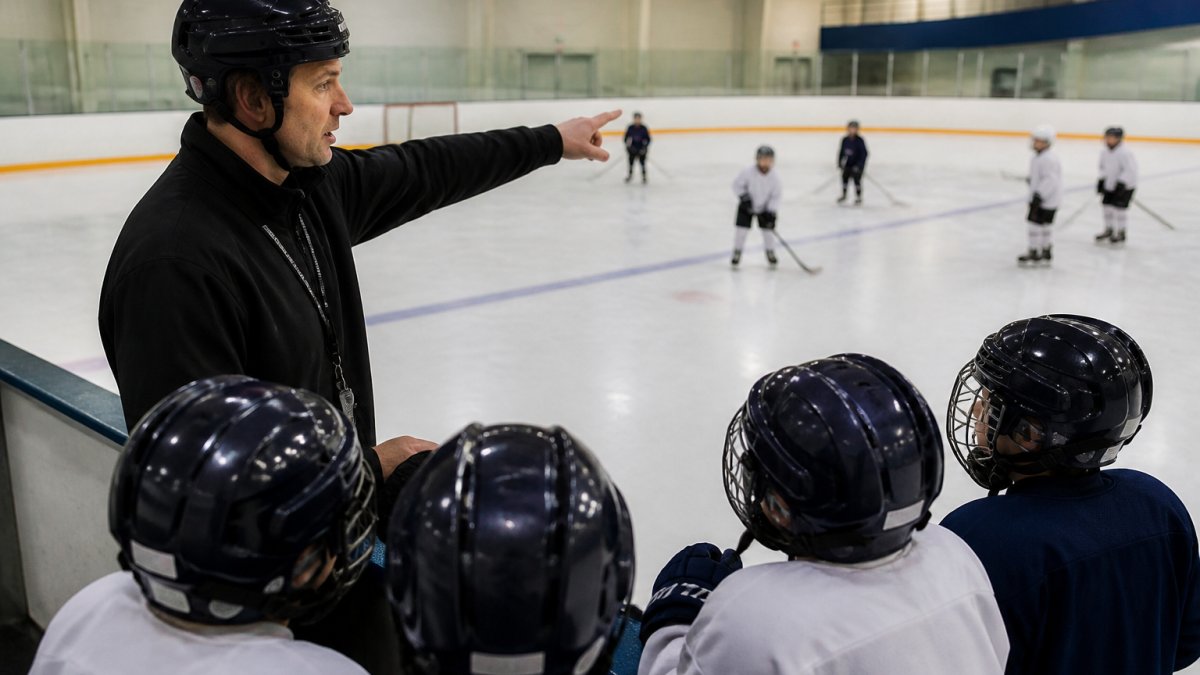
Systems only stick when players understand their role first. A player who knows their job can execute it in any system.
Start with Role Clarity: Position-by-Position Responsibilities
Every position has core responsibilities. Teach those before teaching systems.
Left Wing:
- Stays on the left side of the ice
- Supports the center on passes
- Covers the left defenseman on defense
Center:
- Controls the middle of the ice
- Initiates passes and receives passes first
- Covers the point on defense
Right Wing:
- Stays on the right side of the ice
- Mirrors the left wing's responsibilities
- Supports the center
Defensemen:
- Stay deep in the defensive zone
- Pass to forwards moving up ice
- Cover the perimeter on offense
Once players can execute their position's core responsibilities without thinking, layer in system complexity. They'll understand HOW to play their role within the system.
Layer Complexity: Offensive Zone, Defensive Zone, and Transitions
Teach positioning in phases. Start with offense in one zone, then add defense, then add transitions.
Phase 1: Offensive Zone Positioning
- Players learn where to be when their team has the puck in the attacking zone
- Focus on spacing and support
- Practice for 5-10 minutes until positioning looks natural
Phase 2: Defensive Zone Positioning
- Players learn where to be when the other team has the puck
- Focus on coverage and gap control
- Practice separately until it's automatic
Phase 3: Transitions
- Players move from offense to defense and back
- This is where most youth teams break down
- Practice transitions for 10-15 minutes every session
Layering prevents overwhelm. Players master one phase before moving to the next.
Hockey Practice Plans for Team Strategy: From Beginner to Competitive
Practice plans work when they're intentional. Every drill teaches positioning. Every repetition reinforces the system.
30-Minute Beginner Practice Theme: Puck Movement and Support
Warm-up (5 minutes):
- Skating drills in a straight line
- Focus: get players moving and comfortable
Positioning Focus (15 minutes):
- 3-on-3 small-area game in the offensive zone
- Players learn support and passing lanes
- Rotate lines every 2 minutes
Skill Drill (5 minutes):
- One-touch passing drill in a square
- Players pass immediately after receiving
- Reinforces positioning as being in a passing lane
Cool-down (5 minutes):
- Light skating and stretching
What players learn: Positioning means being ready to receive or support the puck. Movement creates options.
45-Minute Intermediate Practice: Game Situations and Decision-Making
Warm-up (5 minutes):
- Skating and passing drills
Positional Drill (10 minutes):
- Zone-constrained 4-on-4 game
- Forwards stay in offensive half, defensemen in defensive half
- Players learn positional responsibility
System Introduction (10 minutes):
- Coach explains a simple offensive system (e.g., pass to the wing, wing passes to center, center shoots)
- Demonstrate on ice with one line
- Players see positioning in action
Game Situation (15 minutes):
- 5-on-5 scrimmage with system focus
- Coach stops play to reinforce correct positioning
- Players practice system in game-like situations
Cool-down (5 minutes):
- Light skating and stretching
What players learn: Systems have structure. Positioning changes based on where the puck is. Decision-making matters.
Competitive-Level Practice: Power Play, Penalty Kill, and Transition Positioning
Warm-up (5 minutes):
- Skating and passing at game speed
Power Play Drill (12 minutes):
- 5-on-4 setup with specific positioning
- Forwards learn spacing on the perimeter
- Defensemen learn how to support from the point
Penalty Kill Drill (12 minutes):
- 4-on-5 setup with zone coverage
- Forwards learn how to pressure and disrupt
- Defensemen learn gap control
Transition Drill (12 minutes):
- Full-ice game with emphasis on transitions
- Players move from offense to defense and back
- Coach reinforces correct positioning in transitions
Cool-down (4 minutes):
- Light skating and stretching
What players learn: Specialized systems require specific positioning. Transitions require awareness and speed. Execution matters at competitive levels.
Teach Hockey Positioning Using an Interactive Hockey Strategy App
Visual learning sticks better than verbal instruction. When a player sees their position change as the puck moves, they understand the system faster.
Hockey Positioning™ transforms complex strategies into an interactive experience. Players drag the puck across a full ice surface and instantly see where every player should be. This immediate visual feedback teaches positioning faster than any whiteboard drill.
Visual Learning: See Positioning Instantly at Every Puck Location
Interactive apps show positioning for every scenario.
The app includes pro coaching tips at every puck location. Players don't just see the positioning, they understand WHY that positioning matters.
This works for every age group. A 7-year-old can drag the puck and see positions change.
The immersive hockey sounds and customizable jersey colors keep players engaged. Learning positioning becomes fun instead of frustrating.
Measuring Understanding: How to Know Positioning Has Actually Stuck
The hardest part of teaching positioning is knowing when players actually understand it.
Hockey Positioning™ lets coaches test understanding. Players interact with scenarios and make decisions.
Ask a player: "The puck is here. Where should the left wing be?" If they can answer correctly without being told, they understand positioning.
Test understanding in multiple scenarios. Offensive zone, defensive zone, transitions, power play, penalty kill.
Common Positioning Errors and How to Correct Them On the Ice
Most positioning mistakes come from habit, not lack of effort. Players default to old patterns even after learning new ones. The fastest correction is immediate, observable feedback tied to a specific spot on the ice, plus a simple way to measure whether the correction stuck.
Error 1: Chasing the Puck Instead of Supporting
What it looks like: two players converge on the puck carrier; the weak-side lane is empty; the puck carrier has no outlet.
Correction cue: "Strong side supports, weak side spreads." Freeze play, point to the empty weak-side lane, and ask the chaser where the pass should have gone.
Observable measure: in a 5-minute small-area game, count how many times the weak-side lane is occupied when the puck is on the strong-side wall.
Error 2: Leaving Gaps in the Defensive Zone
What it looks like: the weak-side point is open, the backdoor lane is open, or the low slot is empty while the puck is on the wall.
Correction cue: "Strong-side point, weak-side backdoor, center low slot." Walk through the three spots without pucks, then repeat at half speed with a coach moving the puck along the wall.
Observable measure: during a defensive-zone drill, count how many times the weak-side point receives a clean pass.
Error 3: Crowding Teammates Instead of Spreading Out
What it looks like: two forwards within a stick length of each other on the same wall; no seam option; the puck carrier is double-teamed.
Correction cue: "Wall and seam." Mark a 10-foot spacing zone with cones in practice and require players to stay outside it when they do not have the puck.
Observable measure: in a 4-on-4 game, count how many passes are made into the slot seam versus along the wall.
Error 4: Not Moving to Open Ice on Offense
What it looks like: the weak-side winger stays on the wall instead of drifting to the seam; the center stands still in the slot; the point is covered but no one is open.
Correction cue: "Find the seam." Stop play, point to the open seam, and have the player skate to it before restarting.
Observable measure: in a 5-on-5 scrimmage, count how many times a forward receives a pass in the slot seam. Track it for two practices, then compare.
Error 5: Both Defensemen Drifting to the Same Side
What it looks like: both defensemen end up on the puck side of the ice; the weak-side backdoor is open; the breakout has no second outlet.
Correction cue: "Puck-side behind, weak-side high." Walk through the breakout spots without pucks, then repeat with a coach acting as the forechecker.
Observable measure: in a breakout drill, count how many times the weak-side defenseman is available as a second outlet.
A Simple Progress Check for Any Error
Use a three-question check after each correction:
- Can the player state the spot? Ask them to name where they should be before the next repetition.
- Can the player move to the spot on cue? Freeze play and see if they adjust without being told twice.
- Can the player apply it in a game-like rep? Watch one small-area game and tally the correct positioning.
If a player can do all three, the correction has stuck. If they can only do the first, they have memorized a phrase, not learned a position. The fastest way to fix errors is immediate feedback plus a simple tally that shows whether the fix is holding across practices.
Frequently Asked Questions
How do you teach hockey positioning to young players so they stop chasing the puck?
Start with one role at a time: teach the center where to be, then add wingers, then defensemen. Use small-area games where players must stay in assigned zones before introducing full-ice play. Visual tools like an interactive hockey strategy app let players see correct positioning instantly at every puck location, making the concept stick faster than whiteboard diagrams. Repetition across multiple practices with consistent themes builds the habit.
What's the difference between teaching hockey positioning and just having the coach draw plays on a whiteboard?
Drawings are static; hockey positioning requires movement and decision-making in real time. An interactive hockey strategy app lets players drag the puck across the ice and watch all five players move to their correct positions simultaneously. This dynamic, game-like repetition creates muscle memory and tactical awareness that transfers to the ice. Players also hear coaching tips at every puck location, reinforcing why positioning matters, not just where it is.
Can a 7-year-old beginner understand hockey positioning, or is it too advanced?
Beginners aged 5-13 learn best through visual, interactive methods rather than verbal explanation. Start with simple concepts: stay in your lane, support the puck carrier, cover your player. An app designed for young learners uses intuitive drag-and-drop mechanics and colorful visuals without complicated diagrams. Age-specific adaptations matter, younger players need fewer responsibilities and smaller areas; older beginners can handle more complex systems like power plays and penalty kills.
How do coaches know if players actually understand positioning during a game, not just in practice?
Watch for decision-making speed and spacing. In games, positioned players move to open ice quickly, pass to teammates with support options, and read transitions without hesitation. Practice using game-situation drills where players must react to changing puck locations, this reveals whether they understand the 'why' behind positioning or just memorized a drill. If a player struggles in-game after strong practice performance, they haven't internalized the system yet; return to smaller, more constrained drills to rebuild understanding.