 ultimate-guide
Hockey Positional Play Guide for Kids
Quick Summary
Positional play means each hockey player holds a defined area, supports teammates, and keeps team structure throughout a shift, instead of chasing the puck. Kids learn it by understanding their role, practicing short drills like cone circuits and 3-on-3 freeze tag, and building hockey IQ through anticipation.
- Positional play means holding a defined area and maintaining structure throughout a shift.
- Puck chasing leaves holes because nobody covers the open area where the next pass goes.
- Ask players to name their zone and where the next pass is going during 3-on-3 freeze drills.
- Use cones or tape lines to assign each player a visible zone during practice.
- Keep forwards from crossing the center line until the puck has left the defensive zone.
Table of Contents
- Why Positional Play Matters for Young Hockey Players
- Understanding the Five Positions on the Ice
- How to Stop Puck Chasing in Youth Hockey
- Youth Hockey Positioning Drills for Practice and Home
- How to Improve Hockey IQ at Home
- Common Positioning Mistakes and How to Fix Them
- Your Next Step: Starting Positional Training This Week
- Frequently Asked Questions
Why Positional Play Matters for Young Hockey Players
Last Updated: November 4, 2026
Most young hockey players spend their first few seasons chasing the puck. It's a natural instinct, and it can hold kids back in their development.
Positional play means each player holds a defined area, supports teammates, and maintains structure throughout a shift.
Coaches and parents often describe this as "hockey IQ." It's the ability to read the play, anticipate where the puck is going, and be in the right spot before it arrives.
Understanding the Five Positions on the Ice
Every skater on the ice has a job tied to a position, and youth players benefit from learning what each job requires. The five positions are center, left wing, right wing, left defense and right defense, with the goaltender covering the crease.
Young players usually learn positions by watching older kids or pros, which can leave gaps in understanding. A structured approach helps: teach the role, then teach how that role changes in each zone.
The Role of the Center
The center is typically the most mobile forward. Centers take faceoffs, support both wings, and often serve as the link between offensive and defensive play. A common mistake is letting the center drift too far into the offensive zone, which leaves the neutral zone open for a counterattack.
Teach centers to think of themselves as the hub. They should move to where the puck is, but they also need to remember where their teammates are supposed to be.
Responsibilities of Wingers and Defensemen
Wingers cover the width of the ice on their side. On offense, they support the puck carrier and create passing lanes. On defense, they backcheck and pressure the opponent's wing.
Kids often confuse these roles, especially when they're playing a position they've never tried before. Walk through each role on the ice, not just in a meeting room, so the responsibilities feel concrete.
How to Stop Puck Chasing in Youth Hockey
Puck chasing is the habit of following the puck around the ice instead of holding a position. Learn how to stop chasing the puck with a dedicated fix for this habit.
The fix starts with awareness. Players need to learn that their job is to be where the puck is going to be, not where it is right now.
Practice this in small ground games. Set up a 3-on-3 situation and stop play every few seconds to ask each player where they should be and why.
Watch out: a player who stops chasing can start hesitating.
Youth Hockey Positioning Drills for Practice and Home
Drills turn understanding into habit. The most effective positioning drills are short, repeatable, and tied to a specific game situation, such as breaking out of the defensive zone or defending a two-on-one. Below are four drills you can run on the ice or at home, each with a clear setup, coaching cue, and progression so you can adjust for age and skill.
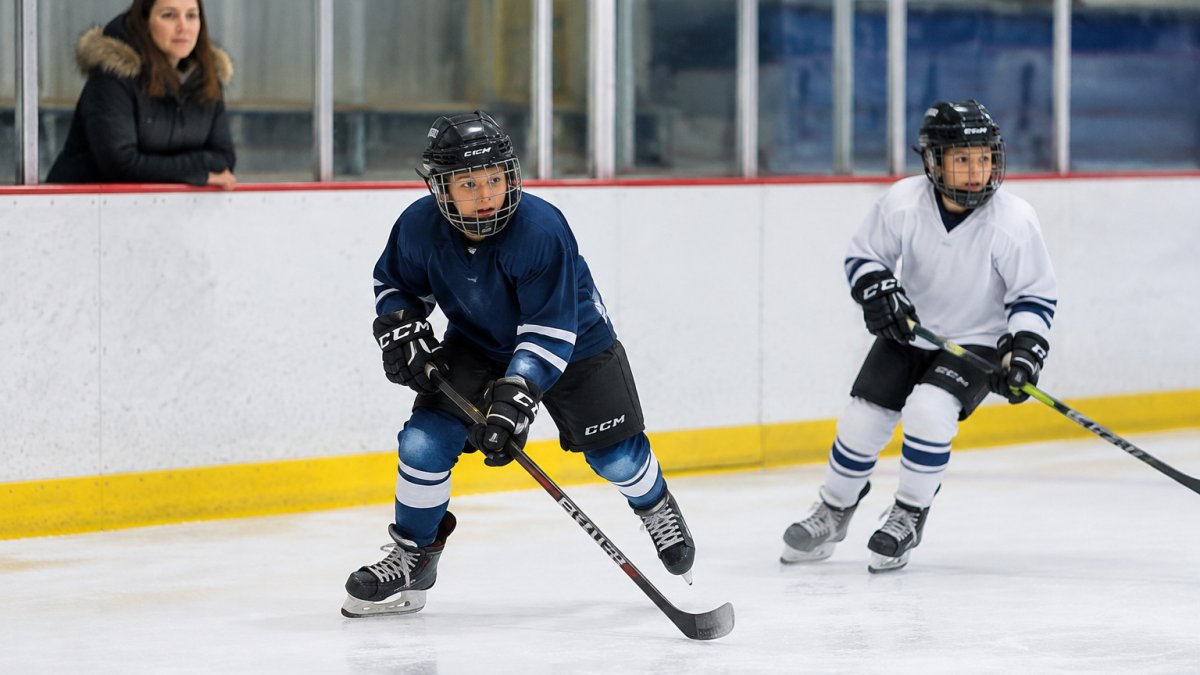
On-Ice Drill 1: Cone-to-Cone Positioning Circuit
Setup: Place four cones in a diamond shape about 20 feet apart in the neutral zone. Assign each player a home cone. On the whistle, players skate to the next cone in a clockwise direction, but they must arrive in a hockey stance (knees bent, stick on the ice) and scan the ice before moving again.
Coaching cue: "Touch your cone, look over your shoulder, then move." This teaches players to hold a spot and read the play before reacting.
Progression: Add a puck carrier who skates through the diamond. Players must hold their cone until the puck carrier passes their line, then adjust one cone over to maintain support.
Watch out: Players often rush the circuit and forget the scan. Slow the whistle down until the scan becomes automatic.
On-Ice Drill 2: 3-on-3 Freeze Tag Positioning
Setup: Play a small-area 3-on-3 game in one zone. Every 15 to 20 seconds, the coach blows the whistle and freezes play. Each player must point to where they should be relative to the puck and explain why in one sentence.
Coaching cue: "Where is the next pass going, and who covers that lane?" This builds the anticipation habit that prevents puck chasing.
Progression: Remove the freeze and let play continue, but award a point to the team that maintains proper spacing for a full 30-second shift. This shifts the reward from puck touches to structure.
At-Home Drill 3: Mirror Zone Movement
Setup: In a driveway or basement, mark three zones with tape or cones: left, center, right. One player leads a movement pattern (side shuffle, backward skate, crossover) and the other mirrors it while staying inside the assigned zone. Switch leaders every 60 seconds.
Coaching cue: "Stay in your lane, mirror the feet, keep your stick ready." This reinforces lateral movement and zone discipline without ice time.
Progression: Add a tennis ball that the leader rolls across zones. The mirror player must call out which zone the ball is in and adjust without leaving their own zone.
At-Home Drill 4: Living-Room Read-and-React
Setup: Use a small puck or ball and a parent as the puck carrier.
Coaching cue: "Stay between the puck and the net, and keep your feet moving." This teaches gap control and defensive angle in a low-pressure setting.
Progression: The parent changes speed and direction every few seconds. The child must maintain the same gap without reaching or lunging.
Parents can run these at home with a few cones, a tennis ball, and a driveway. For a fuller program with specific off-ice exercises, see 7 Off-Ice Drills to Build Youth Hockey Positioning at Home, and for a step-by-step method to teach the basics, 7 Steps to Teach Hockey Positioning to Kids walks through the process.
The article's four drills each have a clear setup, cue and progression, which are easy to compare at a glance.
| Drill | Where | Coaching cue |
|---|---|---|
| Cone-to-Cone Positioning Circuit | On ice | Touch your cone, look over your shoulder, then move |
| 3-on-3 Freeze Tag Positioning | On ice | Where is the next pass going, and who covers that lane? |
| Mirror Zone Movement | At home | Stay in your lane, mirror the feet, keep your stick ready |
| Living-Room Read-and-React | At home | Stay between the puck and the net, and keep your feet moving |
How to Improve Hockey IQ at Home
Hockey IQ develops away from the rink as well. Watching games with a child and pausing to ask questions builds the same anticipation skills that drive on-ice decisions.
Video is useful here, though it works best when paired with discussion rather than passive viewing.
For a broader at-home plan that goes beyond these prompts, Improve Hockey IQ at Home: A 2026 Guide covers additional routines parents can run.
Common Positioning Mistakes and How to Fix Them
Several errors show up again and again in youth games. Recognizing them is the first step to correcting them, but the fix depends on the player's age and what they are ready to understand. Below are the most frequent mistakes, why they happen, and how to correct them with language and drills that fit youth players.
Bunching Up Around the Puck
What it looks like: Three or four players converge on the puck carrier, leaving the weak side and point wide open.
Why it happens: Young players equate effort with proximity. They believe being close to the puck is the same as helping the team.
How to fix it: Assign each player a visible zone using cones or tape lines during practice.
Watch out: Players may interpret "stay in your zone" as standing still.
Leaving the Defensive Zone Early
What it looks like: Forwards sprint toward the offensive blue line before the team has secured possession, leaving the defensemen with no passing options and the neutral zone crowded with opponents.
Why it happens: Players want to score, and they have learned that goals come from being ahead of the play.
How to fix it: Set a clear rule: no forward crosses the center line until the puck has left the defensive zone.
Ignoring the Weak Side
What it looks like: Defensemen and wingers focus entirely on the puck side, leaving the far-side opponent open for a cross-ice pass or backdoor play.
Why it happens: The puck draws attention, and young players have not yet developed the habit of scanning away from the puck.
How to fix it: Drill coverage of both sides by placing a second puck or cone on the weak side and requiring players to check it every few seconds.
Overcommitting and Reaching
What it looks like: A defender lunges or reaches for the puck instead of maintaining gap control, and the attacker skates around them.
Why it happens: Reaching feels like a play on the puck, and young defenders have not yet learned that patience and body position are more effective than a stick poke.
How to fix it: Teach the concept of gap control, staying one stick-length plus one arm away from the attacker and matching their speed.
Drifting Out of Position After a Turnover
What it looks like: A player loses the puck and immediately chases it back, abandoning their assigned lane and creating a scramble.
How to fix it: In practice, run a turnover drill where the coach blows the whistle the moment possession changes and players must skate to their defensive zone assignment before pressuring the puck.
Another useful visual for showing kids where each position belongs on the ice is covered in Positional Play Visual: Teaching Hockey Positions to Kids, which is helpful for spotting these mistakes in practice.
Your Next Step: Starting Positional Training This Week
Pick one position, one drill and one habit to focus on for the next seven days.
Hockey Positioning™ is an interactive mobile application designed for players aged 5 to 13 and adults new to the sport. You drag the puck across a full interactive ice surface and watch players move to their correct positions for each scenario, from power plays to penalty kills, with pro coaching tips at every puck location.
Frequently Asked Questions
How do I teach my kid to play positions in hockey?
Start with one simple rule per position rather than a full playbook. Explain that the center goes to the puck, the wingers cover the flanks, and the defensemen protect the front of the net. Use a few cones on a driveway or in the living room to show where each player should stand. Repeat the same setup over several sessions so your child builds a consistent mental picture, and ask them to explain where they should be after each drill.
How can I teach positional play in hockey without confusing my child?
Limit the lesson to one idea at a time, such as staying between the puck and your own net. Avoid tactical terms until the child can already act on the idea. Praise correct positioning more than goals scored, since young players often chase the puck because it feels rewarding. Short, frequent sessions of five to ten minutes work better than one long explanation.
At what age should kids start focusing on specific hockey positions?
Most youth programs introduce basic positional awareness around the ages of 7 to 9, when players can skate fluently enough to follow a plan. Before that, focus on skating, puck control and general ice awareness. Specialized roles become more important as players move into older age groups, but the habit of staying in position is worth building early.
How do I improve my child's hockey IQ at home?
Talk through game situations during car rides or dinner, asking questions like where the open player is and where the puck should go next. Watch full games together and pause to point out positioning. Off-ice games that involve reading the play, such as tag variations where players must stay in zones, build the same anticipation skills used on the ice.
Can a phone app help kids learn positional play?
A visual, interactive app can help children see how players move in response to the puck, which is hard to picture from a whiteboard diagram alone. Hockey Positioning™ lets users drag the puck around a full ice surface and see players move to their correct spots, with coaching tips at each location. It works best as a supplement to practice and coaching, so check current pricing and the free trial on the Hockey Positioning™ website.